Congratulations, we’re guessing you might have done your very first livestream at this point!
In case you need a guide, we’ve recently written a quick how-to to help you with the process. Now onto the next part, how do you spice up your streams?
You might have heard of the saying “Simplicity is the ultimate sophistication” or something about encouraging minimalism, but adding a few stream alerts and overlays to your broadcasts can make it more appealing to attract new audiences.
Any aspiring streamer wouldn’t want to turn away potential new followers and subscribers just because they find your streams too bland and dry, after all.
Stream design
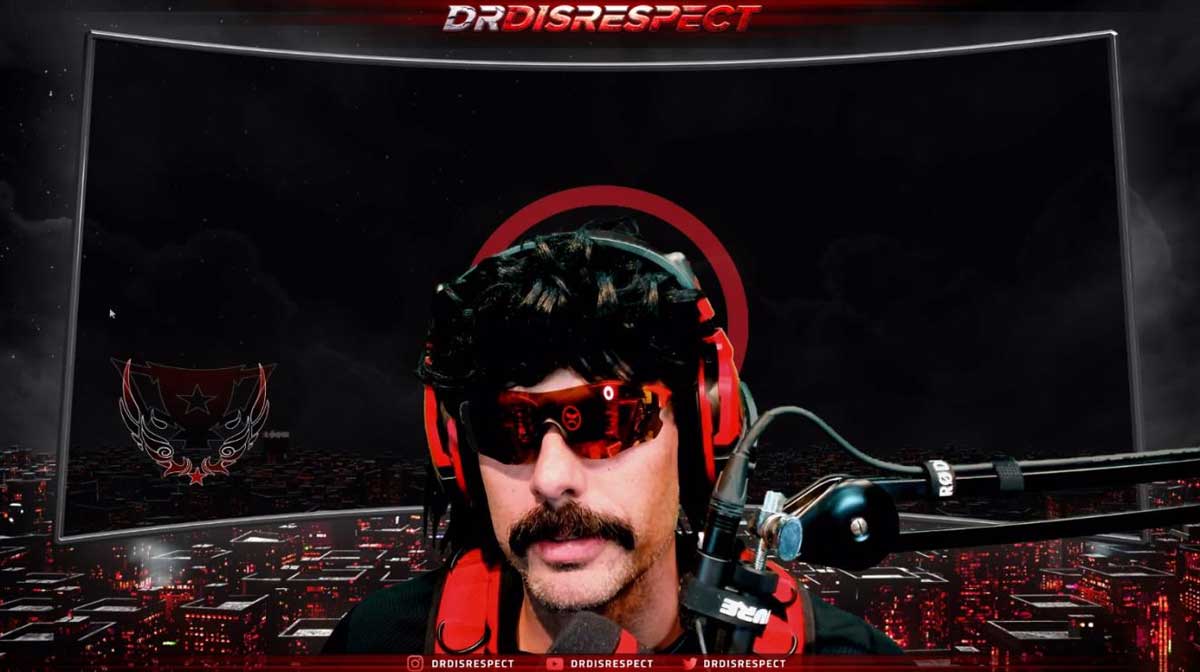
Even the big-name streamers add overlays and special effects to their streams. Take for instance DrDisrespect, who is known and respected for his production quality with the clever use of green screens, back drops, and an intriguing persona.
He effectively maintained the jaw-dropping production quality through the years, despite his initial setup which appears to encompass a room using sound proofing on the walls, an oversized green screen, and a tripod webcam set-up to create his locker room and other various scenes.
Thanks to his creativity, DrDisrespect effectively pulled in new audiences and he made a name for himself in the industry partly because of his iconic stream design.
You don’t need to pull off the exact, same tricks as the two-time for your streams. As a beginner, you can take little steps to grow your stream quality towards the right direction:
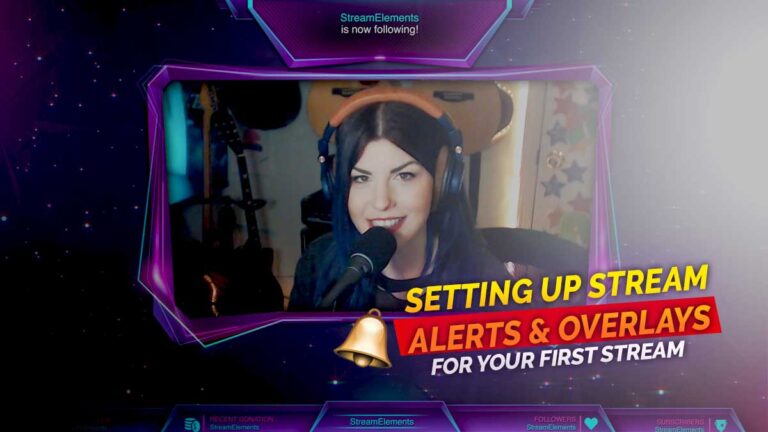
What are overlays?
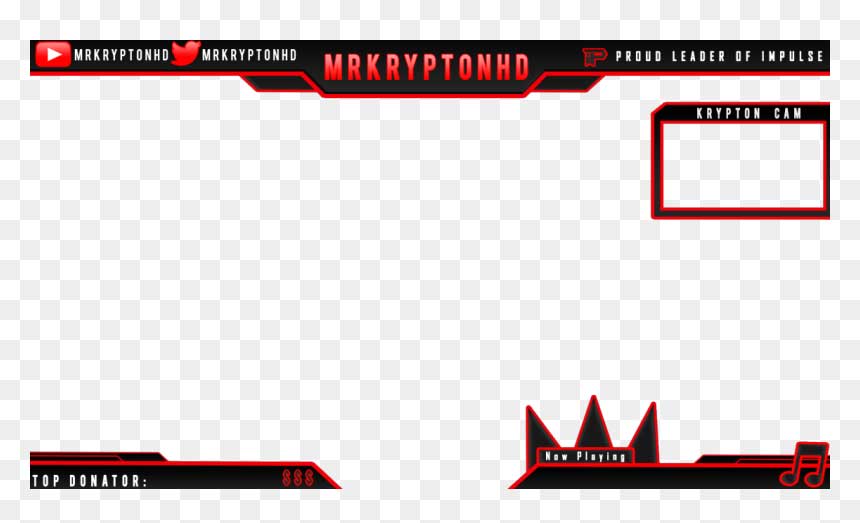
Overlays are the graphics that you lay over your gameplay and camera feed to make it more visually engaging.
They come in a variety of designs, styles, and colors. You can opt to have a static one for simplicity or you can have an animated one which is far more entertaining to watch.
Some of the most common overlays are transparent PNG files, which you can easily layer over background sources. But, overlays generally refer to multiple graphic types— most of which can be neatly scaled and positioned using your software of choice and then to your chosen streaming platform.
Big-shot streamers commission graphic artists to customize a personalized overlay that’s fit for their online persona, making it iconic and one-of-a-kind.
Are overlays important?
Overlays are recommended for every aspiring streamer, since they give your content a branding edge. If your gameplay is good and you have a neat overlay design, it may even boost your viewer engagement.
Providing quality content is a key factor if you want to work towards channel monetization. As a small streamer, it allows you to uniquely distinguish your channel from the millions out there.
One thing you need to look out for on your stream overlays is to not overload it, so as not to overwhelm your audience. Avoid making your livestream a cluttered mess to watch. Hence, it’s important to be selective and meticulous in which graphics to include.
Setting up overlays
Before you set up your stream overlay, you must first find the overlays that’s fit for the content you are planning to offer. For instance, you can search for free designs on the internet (which is highly advisable for small, aspiring streamers).
Then, to add a personal touch, you can opt to adjust every element of the overlays to separate you from the others who are also using the same overlay package.
Now that you already have your overlay files, you need to simply import it on your chosen streaming software such as OBS Studio, Streamlabs OBS, and StreamElements (OBS.Live),
If you’re working with static overlay files for your first stream, here’s how you can add the files:
- Go to the ‘Sources’ panel, tap + and choose ‘Image’.
- Select the image from your local drive and resize accordingly.
Webcam overlay
Many streamers also feature their camera in their livestreams. If you want to set up webcam frames, here’s how you can add them as overlays:
- Add your webcam frame as a source. Take note that a source is any media asset (images, animations, sounds, etc) that can be added on your stream.
- Hit the “+” (plus) button under the Sources box to add a new source. If your webcam overlay is static, you’ll want to select “Image” from the list.
- For animated frames (most commonly .webm, .mp4 or .mov files), select “Media Source”.
- Click “Browse” in the next window and navigate to your file, and your webcam frame graphic should now appear in the preview window.
- Reposition and resize the frame as you deem fit for your unique layout.
- Now add your camera feed, click the “+” to add another source, and select “Video capture device.” Drag and reposition your camera source so that it fits perfectly within your frame.
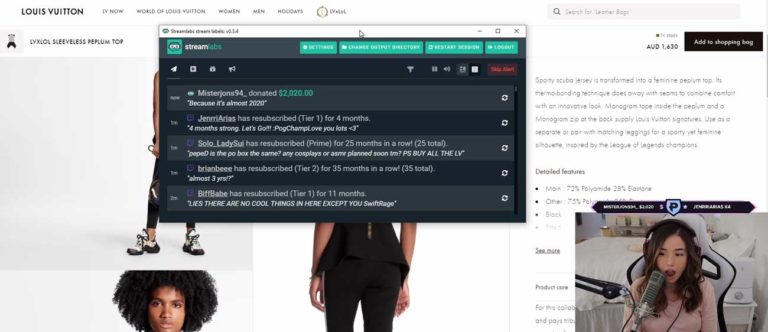
What are stream alerts?

Stream alerts are another must for any aspirants, especially if you are eyeing to monetize your content or build a tight-knit online community.
If you’re not that well-versed in streaming, alerts are the notifications that usually pop up on screen in the middle of your live broadcast. These alerts are triggered when your audience interact with your stream in any way, such as liking the video, subscribing to your channel, or sending monetary donations.
Are stream alerts important?
Having stream alerts on for your streams provide an avenue for viewers to show their support. It serves as a form of incentive for your audience to actively participate and interact with you everytime you go live.
Like overlays, there are also different styles of stream alerts you can choose from. You can pick from static or animated alerts, though we advise going for the latter since the multi-dimensional presentation would greatly improve your stream quality.
How to set up stream alerts
If you’re deciding which to pick between Streamlabs and StreamElements, the good news is— uploading and setting up alerts is pretty similar for both.
To add to your convenience, most professional alerts now come with a “one-click” set-up to make the entire process easier even for beginners.
First, find the download files for your new alerts and then select your preferred streaming software. You’ll then be redirected to your browser to log in to your account and start personalizing your alerts.
Explore the available settings and adjust things like fonts, size, colors, and animations. Afterwards, don’t forget to copy the browser source URL for the alerts.
And then, open your preferred streaming software and add a new source “Browser Source.” Paste your URL and your personalized settings and any custom coding will be automatically copied over.
Feel free to rearrange, resize, and test your alert displays to your liking before you go live.
Benefits of stream alerts and overlays
Before you go on telling yourself simplicity is the best approach for your streams without any of the aesthetic whatsoever, you might want to read on why having stream overlays and alerts can benefit your streaming career in the long run. Trust us, the extra effort will be worth it!

-
Aesthetic purposes
There are lots of streamers with professional in-game skills with their streams gaining little traction or concurrent viewer count. Why? The audience simply do not see their streams entertaining enough to tune in for a longer while.
The overlays and alerts add a certain personalized aesthetic to your content. It also shows the effort you are willing to pour if it means improving your stream quality in general.
-
Branding
Putting your own logo and the name of your channel in your stream lay-out would make it easier to establish your online branding.
If someone casually browsing their timelines would stumble across your stream, at least in the first 5 seconds of their viewing they would instantly know who you are.
It’s possible that they would follow or subscribe to your channel if they actually like what they see, so it’s important not to miss out on that opportunity.
-
Incentive
Your most loyal channel supporters would love nothing but recognition, especially when you are live. They would probably thank you if they see their names up on the big-screen whenever they interact with your stream in any way, such as giving a donation or a share.
The alerts, in particular, serve as a form of incentive for your loyal audience to continue the support for your channel. It shows that you care and appreciate the support they’ve given so far, no matter how big or small the actions are. It would also give them some sort of online fame, even if just for a few seconds.
You can customize your stream alerts to show information on-screen such as your recent subscriber, donator, top donation, or your sub count goal. Displaying your progression goal would most likely entice the chat to help you out.
Bottomline
There is no need to be overwhelmed at the thought of adding stream alerts and overlays for your stream, especially if you are a beginner. The process may seem complicated at first, but with hundreds of guides on the internet, you’ll be surprised at how easy it could be.
Remember that all the big-shot names in the industry started where you are right now. They made a commitment to take their broadcasts to the next level and improve the quality of their streams— which is something all aspiring streamers could learn from.